Context Menu Designer - Housing
Learn how to create or customize context menus in the ClientTrack Housing workspace

Written by Jesús DeLeón-Serratos
Updated at August 18th, 2023
Table of Contents
The Context Menu Designer is a tool within the ClientTrack Housing/Shelter workspace that allows developers or designers to create and/or customize context menus.
Context menus, also known as context-sensitive menus or right-click menus, are the pop-up menus that appear when a user right-clicks on a specific element within an application or operating system.
To be able to use this feature, you will need Designer Rights.
The tool's primary goal is to simplify the process of creating and managing context menus, making it easier to tailor the user experience to the specific needs of your system. By using a Context Menu Designer, you can ensure that the context menus are intuitive, functional, and visually consistent with the rest of the user interface.
Where to find it
HOUSING > Inventory > Housing Designer > Select a Housing Facility > Select a Room > Context Menu Designer
Starting from the Housing/Shelter workspace and after selecting the Housing Designer option, you must select one of your Housing Facilities (see image below for reference)

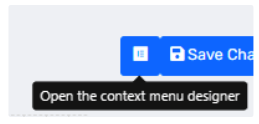
Once you’re in the room grid, the Context Menu Designer can be found on your upper right corner above the toolbox and beside the Save Changes button.
How to customize it
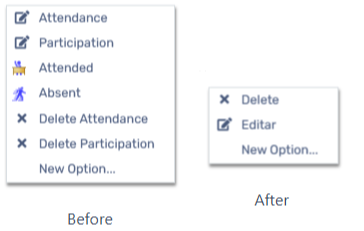
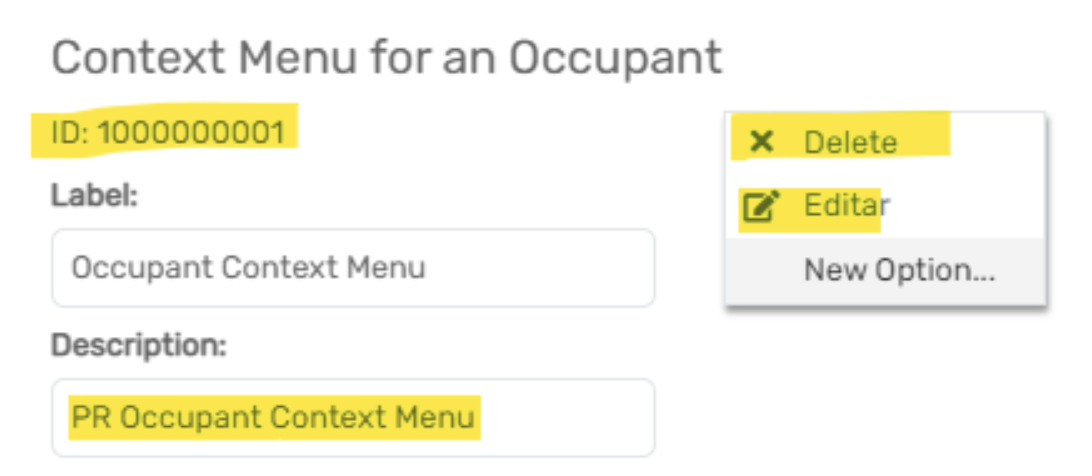
Remember that most menus found within will be baseline. Your hint should be the ID number (see below for reference). Let’s change one of these menus in 4 steps.
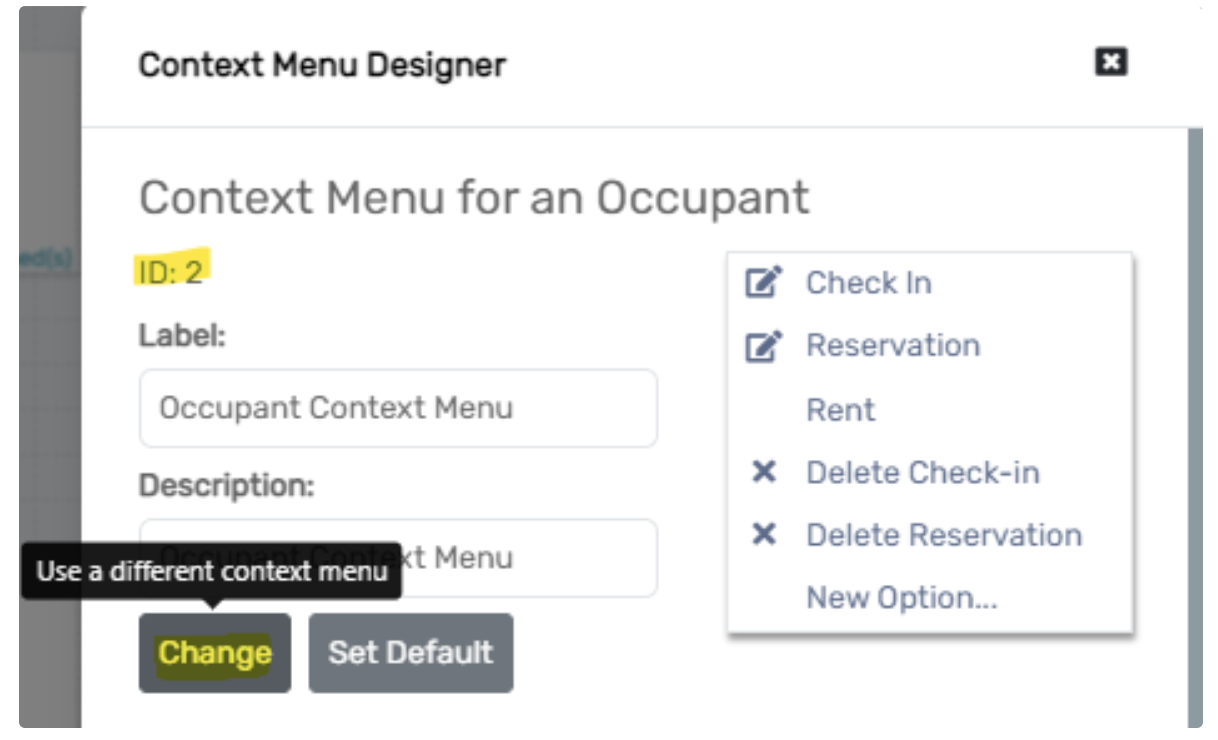
To change a baseline menu, click CHANGE.
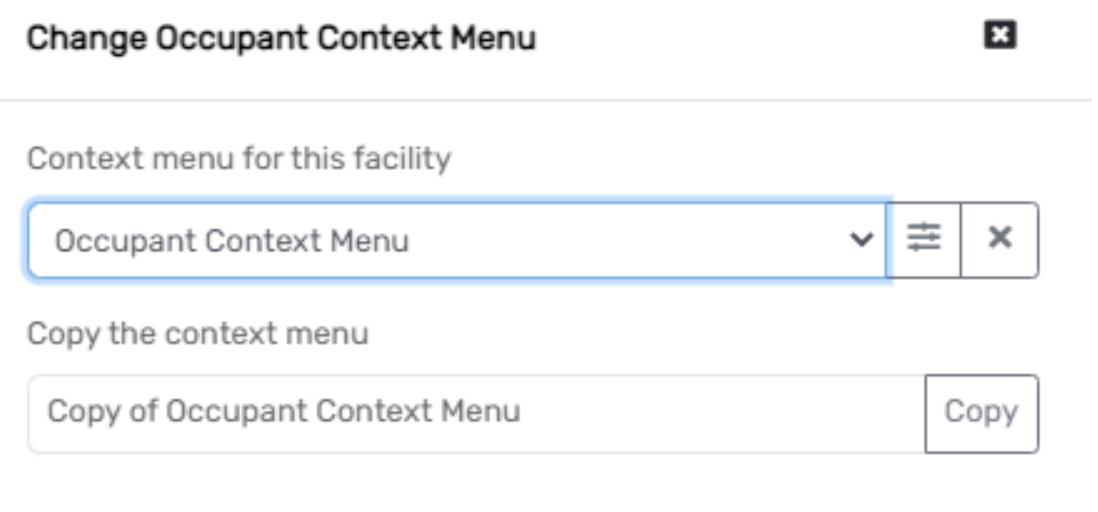
1. Copy the form.
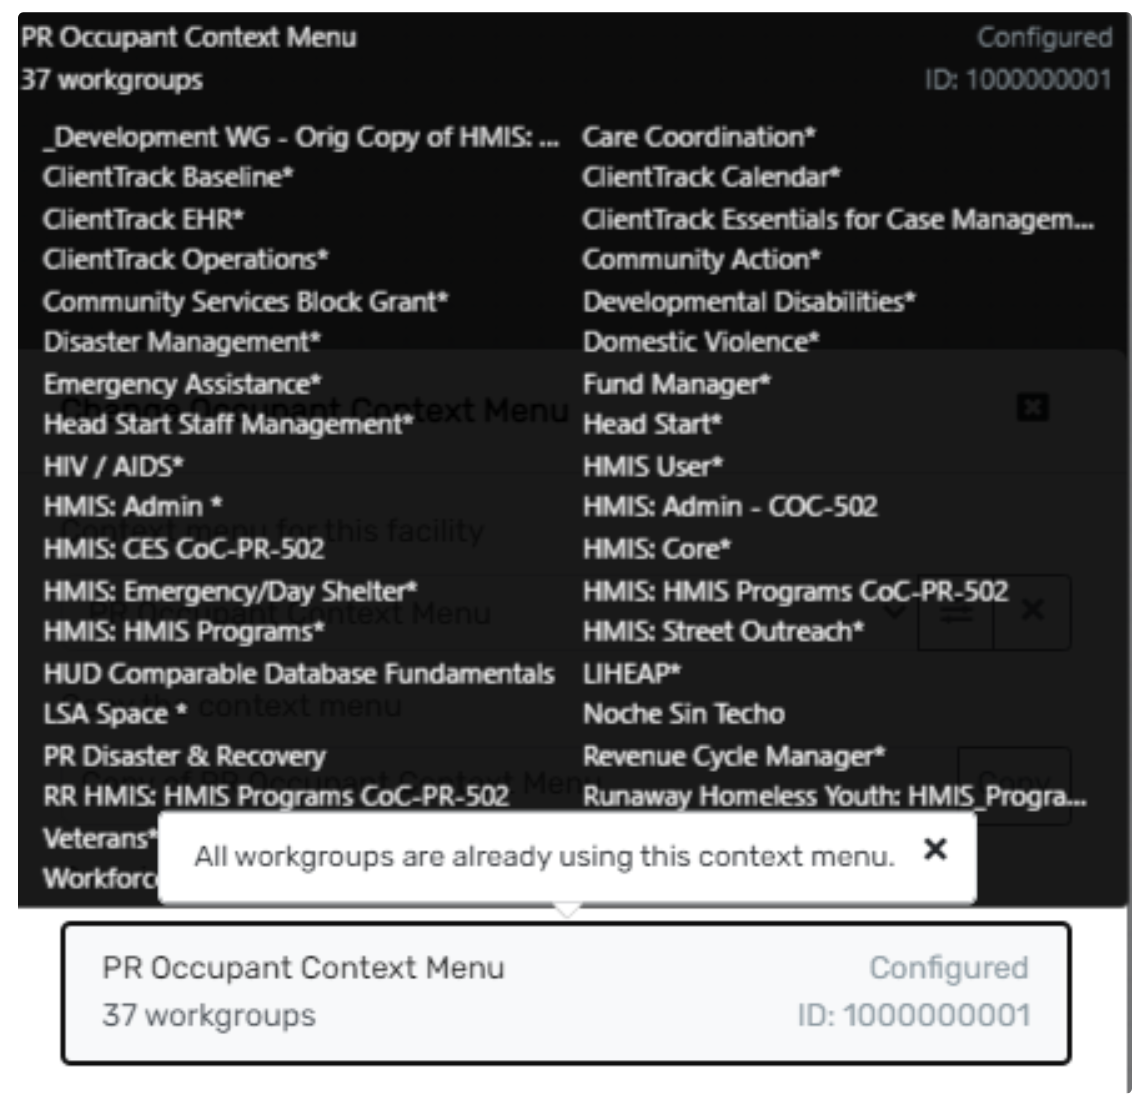
In these two rows below you can see the name will be the same but we added ‘Copy of’. You can change this label to something that will make sense to you for easier selection later.
2. Create your buttons
Once you change the label you can see your new menu’s ID number display. A 1000000000+ number indicates the menu is not baseline. In this new menu you can add, delete or modify the menu options.
3. Assign your new menu options to the appropriate workgroup.
4. Save your changes

Anatomy of the Button
Delete
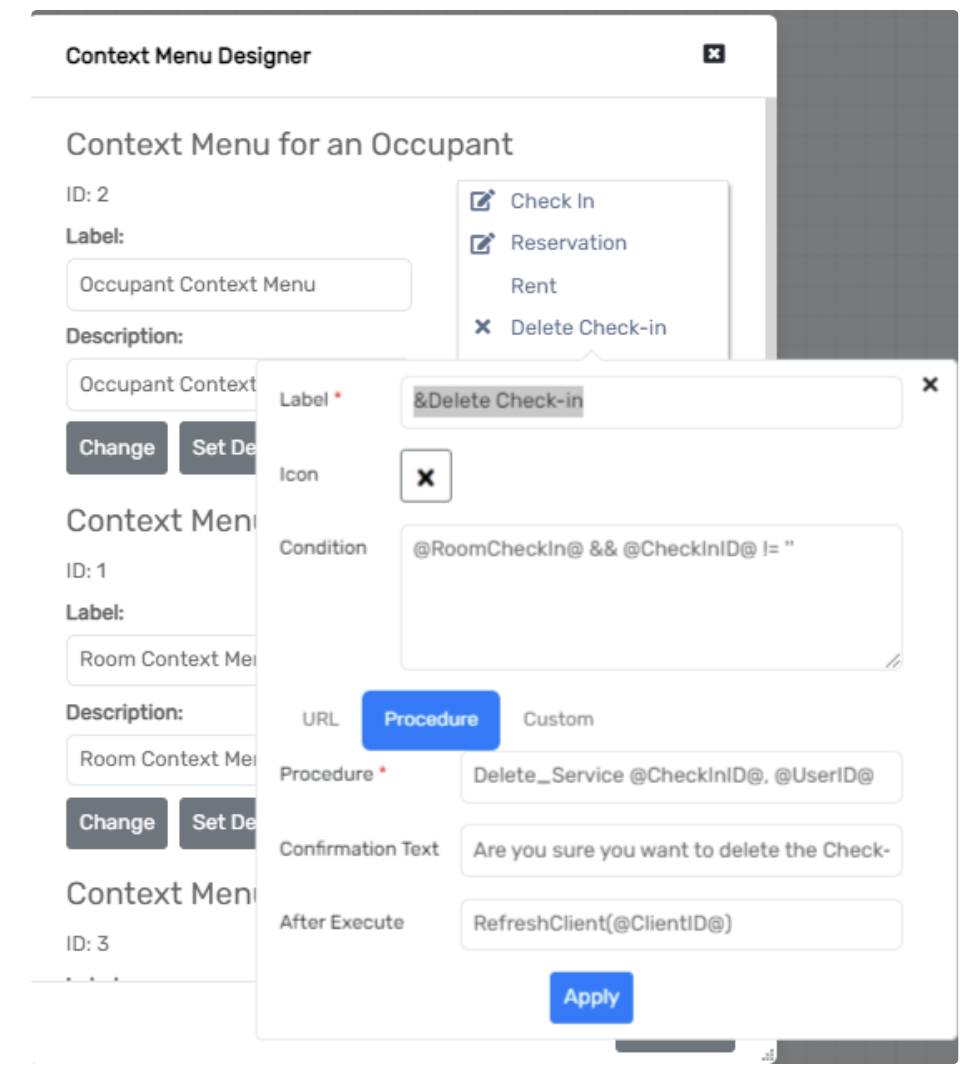
Label: &Delete Check-in
Icon: ✖
Condition: @RoomCheckIn@ && @CheckInID@ != ''
Procedure: Delete_Service @CheckInID@, @UserID@
Confirmation Text: Are you sure you want to delete the Check-in?
After Execute: RefreshClient(@ClientID@)
Check In
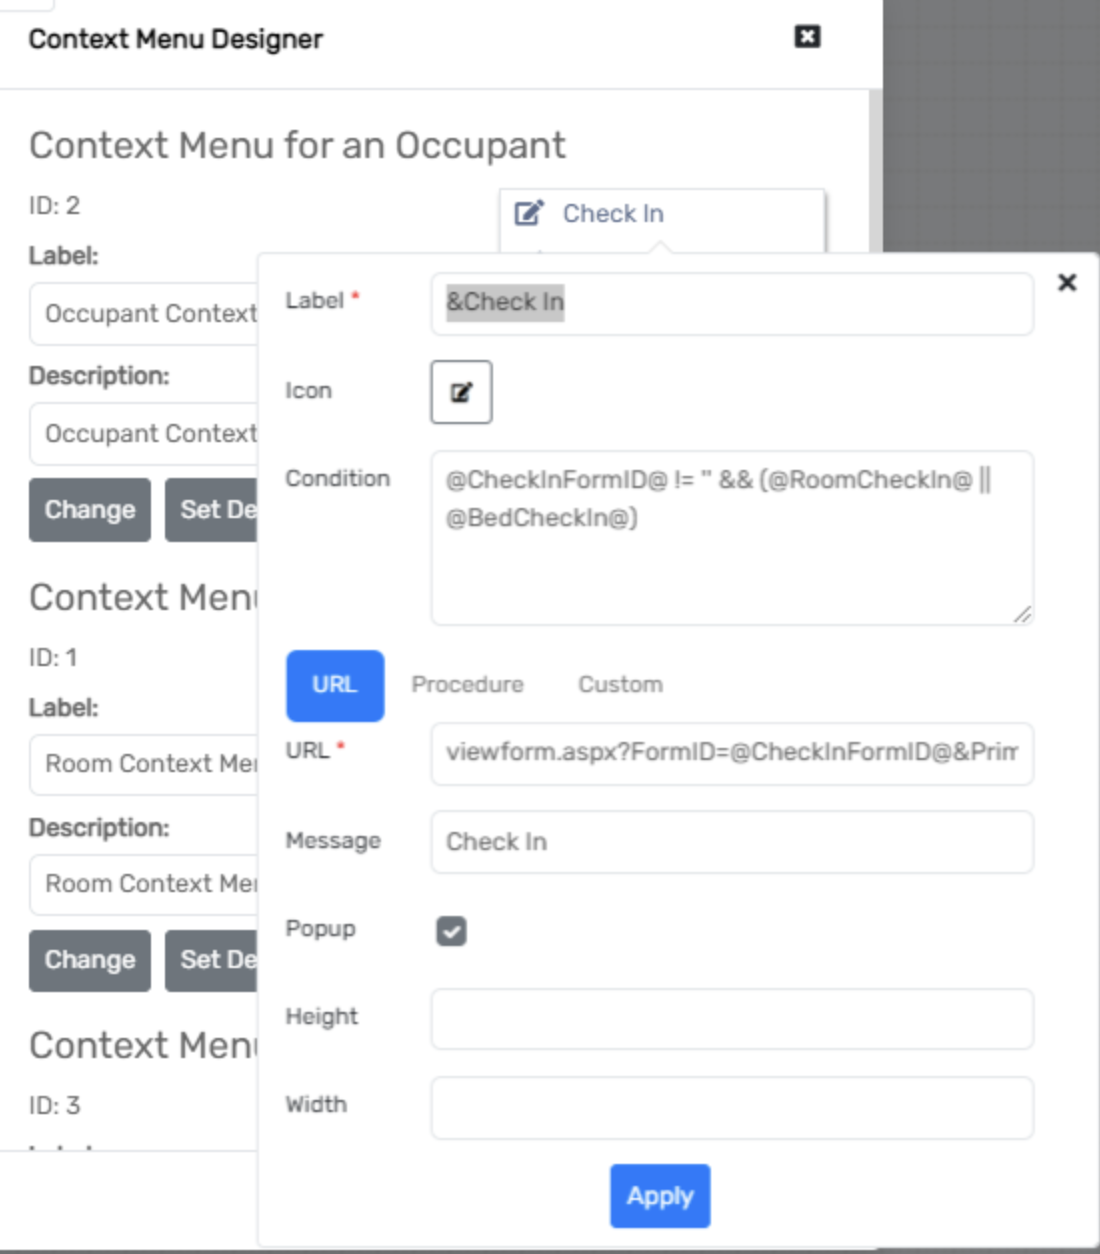
Label: &Check In
Icon: 📝
Condition: @CheckInFormID@ != '' && (@RoomCheckIn@ || @BedCheckIn@)
URL: viewform.aspx?FormID=@CheckInFormID@&PrimaryKey=@CheckInID@&ClientID=@ClientID@&HousingID=@HousingID@&RoomID=@RoomID@&BedID=@BedID@&ViewDate=@ViewDate@&ReservationID=@ReservationID@&CloseSaveScript=RefreshClient(%40Service.ClientID%40)
Message: Check In
Popup: ✅
After Execute: RefreshClient(@ClientID@)
User Access
You can use Additional System Access tools to control view-ability by authorized users.
ToolAccess.parse("access-1")
