Document Check Management
ClientTrack System Administration Guide

Written by April Lockett
Updated at February 4th, 2025
Table of Contents
Document Checklists are utilized in ClientTrack to define a set of requirements. Document Checklists are commonly used to gauge eligibility for a Program or Service and verify that a client has agreed to or submitted certain signed forms.
Navigation
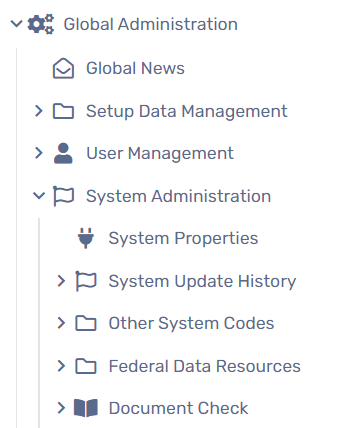
Document Checklists are managed through the Document Check functionality by going to the Home Workspace, Global Administration Menu Group, followed by the System Administration Menu Group, then expanding the Document Check Menu Option, and selecting the necessary Menu Option.
Introduction to Document Checklists
Document Checklists use Verification Items, Acceptable Types, and Storage Types to create a list of documents for front-end Users to record what a client has or does not have during an interaction.
Navigation
Document Checklists are managed by going to the Home Workspace, Global Administration Menu Group, then the System Administration Menu Group, and expanding the Document Check Menu Option and selecting Document Checklist.
Adding a Document Checklist
- On the Document Checklist form, select the Add New List button at the top of the screen.
- Enter the name of the checklist in the Document Checklist Name field and choose your Accessing Organizations for this new list.
- Check the checkbox next to the necessary documents needing to be included in this Document Checklist. The User can also set the order of appearance in the list by entering the appropriate order in the Display Order field.
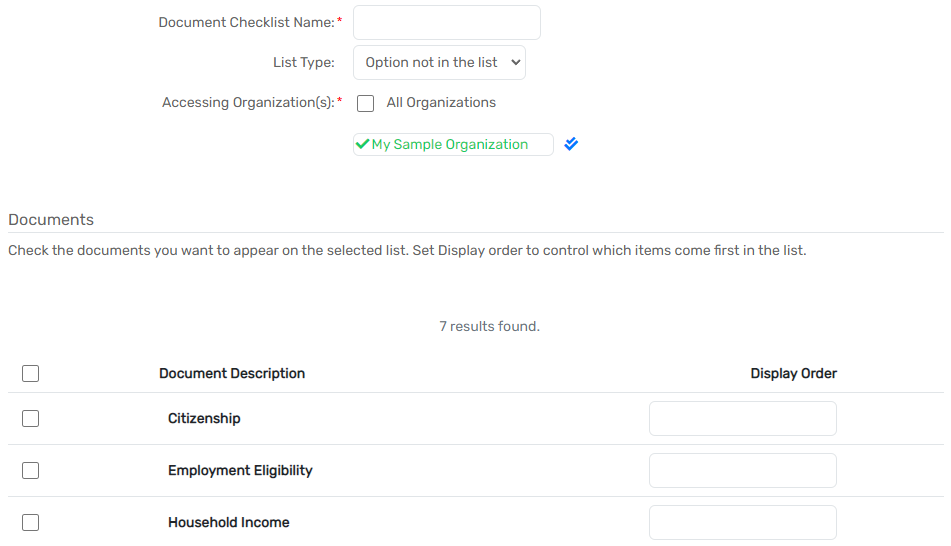
- Select Save
Introduction to Verification Items
Verification Items are the requirements that can be included in various Document Checklists. It is ideal to set these up before setting up the Document Checklist so they are available when you set up the Checklist.
Navigation
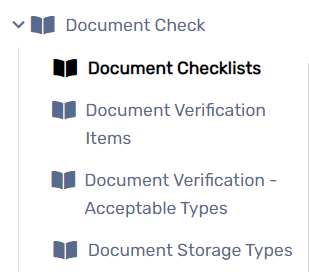
Verification Items are managed by going to the Home Workspace, Global Administration Menu Group, then the System Administration Menu Group, expanding the Document Check Menu Option and selecting Document Verification Items.
Introduction to Acceptable Document Types
Acceptable Types define what ways a verification requirement can be fulfilled. It is ideal to set these up first to be available when you set up a Verification Item.
Navigation
Acceptable Types are managed by going to the Home Workspace, Global Administration Menu Group, then the System Administration Menu Group, expanding the Document Check Menu Option and selecting Document Verification - Acceptable Types.
Adding a New Acceptable Document Type
- On the Document Verification - Acceptable Types form, select the Add New Acceptable Document Type button at the top of the form.
-
Enter a Document Type that will serve as the Acceptable Document Type’s title.

-
Select Save.
